
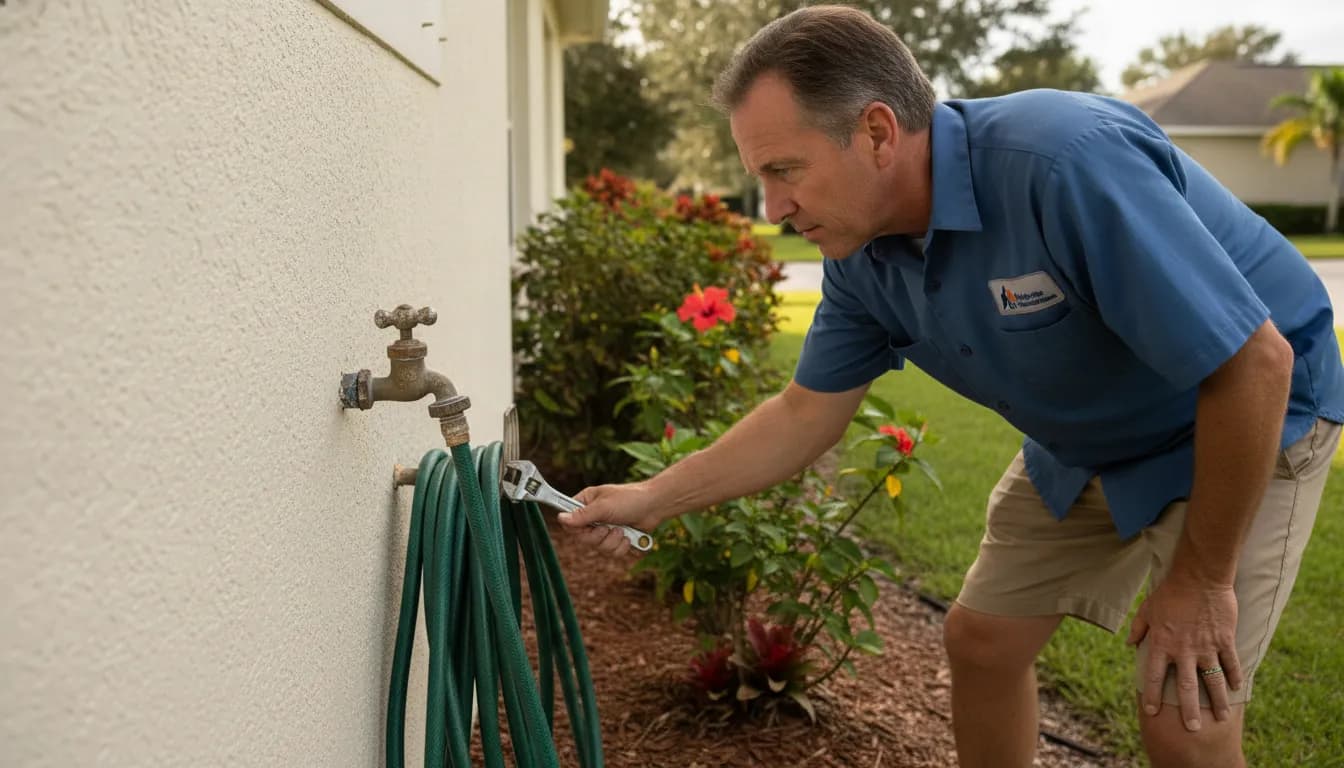
A dripping outdoor faucet is easy to dismiss, but a small leak can waste water, damage nearby walls or foundations, and worsen when temperatures or pressure change. The good news is that many problems can be narrowed down with a few safe checks before you reach for a wrench.
Outdoor faucet repair usually starts by shutting off the local valve or the home's main water supply. Then checking where the leak begins: at the handle, spout, hose connection, or wall penetration. Simple external issues may be manageable, but hidden leaks, damaged piping, and recurring problems call for a plumber.
Start by identifying the symptom without forcing a stuck handle or taking the fixture apart while it is pressurized. Understanding what the leak is telling you will help you protect your home and decide whether the problem is a worn outdoor fixture or something deeper in the plumbing.
Contact Space Coast Cooling & Plumbing for outdoor faucet repair help
What counts as an outdoor faucet problem?
An outdoor faucet, often called a hose bib or spigot, is the fixture that supplies water to a garden hose, sprinkler, or other equipment outside your home. An outdoor faucet problem is more than a drip at the tip. Water may escape from the spout while the handle is closed, around the handle stem while the faucet is running. At the vacuum breaker or hose connection, or where the fixture enters the wall. Each location points to a different repair decision.
Start by removing the hose and drying the faucet with a cloth. Turn the handle on briefly, then watch the fixture closely. A drip from the spout after shutoff can indicate a worn valve-seat rubber or a loose internal retainer. Water appearing around the operating stem while the faucet is on may indicate a packing leak. If a packing nut is difficult to tighten, stabilize the hose bib where it meets the wall rather than twisting the pipe or forcing the fitting. A manufacturer troubleshooting guide recommends snugging a loose packing nut, while persistent leakage may require replacement packing: outdoor faucet troubleshooting guidance.
Also check the wall connection. Water that appears behind the exterior flange, inside the wall, or under the siding is not a simple nozzle drip. A freeze-damaged tube may remain dry until the faucet is turned on, so a leak that starts only during use deserves prompt attention. If water runs continuously for more than a day. That can indicate a leak or a hose bib or valve left open, according to San Francisco Public Utilities Commission guidance: leak alert guidance.
This differs from indoor faucet repair because the outdoor fixture is exposed to weather, hose pressure, accidental impact, and wall penetration. Do not bang a stuck handle or force a corroded connection. Shut off the local supply, if it is safe and accessible, and use the home's main shutoff if necessary. For help distinguishing a worn external part from a supply-line concern, see our guide to local plumbing services. Space Coast homeowners can also have a plumber inspect a suspected in-wall leak before moisture causes more damage.
How to diagnose an outdoor faucet leak safely
Before attempting outdoor faucet repair, identify where the water is coming from and limit the flow. A hose bib can leak at the spout, handle, wall connection, or hose connection, and those locations point to different levels of risk. Use this sequence for observation and safe shutoff rather than taking the fixture apart immediately.
- Make the area safe and remove the hose. Move electrical equipment, stored items, and anything that could be damaged by water away from the faucet. If a hose, splitter, timer, or nozzle is attached, remove it only if it comes off easily. Do not twist aggressively against a corroded connection. Dry the faucet and the surrounding wall so fresh water is easier to trace.
- Stop the water before examining the fixture closely. Look for a dedicated shutoff valve inside the home that controls the outdoor faucet. Close it gently, then open the outdoor handle to relieve remaining pressure. If there is no usable local shutoff, or if water is entering the wall, use the home's master shutoff. Guidance from the Indiana Office of Utility Consumer Counselor recommends using the master shutoff to stop building water flow immediately when a pipe may be frozen or damaged: https://www.in.gov/oucc/watersewer/tips-and-publications/preventing-frozen-pipes/.
- Observe the exact leak point. With the supply restored only when it is safe to test, watch the faucet briefly. Water dripping from the spout while the handle is closed suggests an internal shutoff or sealing problem. Water appearing around the handle or stem points to the packing area. Water at the hose threads may involve the connection, washer, or an attached accessory. Water emerging where the faucet meets the wall is more concerning because the leak may involve the fixture body, the supply connection, or piping inside the wall. Visual inspection is a useful first check, but it cannot rule out a concealed supply-line leak.
- Pay attention to pressure, temperature, and timing. Note whether the leak occurs only when the faucet is on, continues after shutoff, or appears only after the line has been opened. If water is unusually cold or the faucet seems affected by freezing conditions, do not try to thaw the pipe yourself. The same Indiana guidance recommends calling a licensed plumber for frozen pipes and warns that unassisted thawing can cause serious, expensive damage. Read the active water leak steps if water is spreading or the shutoff is not stopping it.
- Do not force a stuck handle. A seized handle can indicate corrosion or damaged internal parts. Banging it, using excessive leverage, or applying heat can turn a manageable fixture issue into a broken valve or wall leak. Stop the test, keep the water shut off, and arrange professional inspection instead. If the source remains uncertain. A plumber can use visual checks and pressure-loss testing to determine whether the problem is limited to the faucet or involves the water supply.
For homeowners in Brevard County, the safest boundary is simple: observe, shut off accessible water, and document the leak location. Leave seized components, suspected freeze damage, and wall or supply-line leaks to a licensed professional.
Outdoor faucet repair for spout and handle leaks
A drip from the spout and a leak around the handle usually point to different parts of the faucet. That distinction matters because a simple worn sealing surface may be serviceable. While a damaged or badly corroded fixture can turn a small repair into a larger plumbing problem.
Leak location clues.
- Water dripping from the spout after the faucet is shut off: A worn or damaged valve-seat rubber, washer, or related sealing part may be allowing water past the closed valve. EPA WaterSense notes that old, worn washers and gaskets frequently cause faucet leaks. See EPA WaterSense faucet guidance.
- Water appearing around the handle or operating stem: The packing area, sometimes controlled by a packing nut, may be leaking while the faucet is running. A packing leak is different from a spout drip because the water is escaping around the stem rather than through the outlet.
- Water appearing at the body, wall connection, or behind the faucet: Stop treating this as a handle adjustment. Moisture at the wall can indicate damage beyond the visible fixture, especially if the leak increases when the faucet is turned on.
Before touching a repair part, identify when the water appears. Watch the faucet with the handle closed, then observe it while it runs briefly, if doing so is safe. Dry the outside of the fixture first so new moisture is easier to trace. If the leak is active or water is entering the wall, use the accessible local shutoff. If there is no usable local shutoff, turn off the home's main supply and arrange an inspection.
Try only gentle external checks
A slightly loose packing nut can sometimes be tightened just until snug, but it should never be forced. If you need a wrench, stabilize the faucet where it meets the wall rather than twisting the pipe inside the structure. SharkBite specifically recommends holding the hose bibb at the wall when a packing nut is difficult to tighten. Source: SharkBite hose bibb repair guidance.
Stop if the nut, handle, or stem is seized, heavily corroded, or beginning to move the entire faucet. Do not bang a stuck handle or apply increasing force. Excessive pressure can damage threads, break an internal component, or stress the pipe connection. A professional can determine whether the packing, washer, or another internal seal is the root cause before disassembling the fixture.
When replacement is the safer choice
Replacement may make more sense when the faucet has frost damage, a cracked body, failed internal components, or corrosion that prevents a dependable seal. A new part-by-part repair can be difficult when matching components are unavailable, and repeated tightening will not correct a damaged body. Frost damage is also a reason to consider replacement. While a frost-free sillcock is designed so its shutoff is located farther inside the inlet and the line can drain. Source: SharkBite hose bibb repair guidance.
For Space Coast homeowners, the practical goal is not simply to stop the visible drip. It is to confirm that the wall and supply connection are dry, then choose a repair or replacement that will hold without forcing damaged parts.
What to do about wall, hose-connection, freeze, or corrosion damage
Not every outdoor faucet leak starts in the same place. Water around the hose connection may point to a worn washer, O-ring, or damaged threads at the end of the spigot. That is different from water appearing where the faucet meets the wall, inside the wall, or along the supply pipe. Before attempting professional leak detection, observe the exact location of the water and shut off the local supply if it is safe and accessible.
A hose-connection drip is often visible only while the faucet is running or while a hose is attached. Turn the water off, remove the hose, and inspect the washer inside the hose fitting. Replace a visibly worn washer only if the connection comes apart easily and the threads are not damaged. Do not compensate for cross-threading by forcing the hose tighter. Excessive pressure can damage the fixture or the pipe behind it.
When the leak is at the wall connection
Water that emerges from the wall opening, follows the outside of the pipe, or appears indoors near the faucet deserves more caution. A faucet that leaks inside the wall while it is running may require replacement, according to Woodford's troubleshooting guidance. The wall connection can also shift when someone tries to turn a corroded or seized faucet. If the fitting moves, stop turning it rather than twisting harder. A second wrench may stabilize some connections, but uncertain access or visible movement is a reason to have the supply connection inspected.
Freeze damage can be deceptive. If water remains trapped in an attached hose or faucet, freezing pressure can damage tubing behind the fixture. Woodford notes that a burst tube may not leak until the faucet is turned on after thawing. That means a faucet can look normal during a quick visual check, then release water into the wall or structure when used. Remove the hose, close the accessible shutoff, and watch for damp drywall, staining, dripping below the faucet, or an unexplained loss of pressure.
Why corrosion changes the repair decision
Corrosion is more than a cosmetic problem. It can keep a replacement part from sealing correctly, leaving the leak unresolved. A corroded faucet body may also have cracks or holes that cannot be fixed with a new washer. SharkBite lists frost damage as an indication that replacement may be appropriate. While its repair guidance explains that damaged internal components can make full fixture replacement more practical than chasing individual parts. These are repair decisions, not good situations for aggressive tightening.
When the leak may involve the wall or supply line, the goal is to identify and stabilize the problem before water damage spreads. Space Coast Cooling & Plumbing provides leak detection, emergency shutoffs, fixture work, and broader plumbing repairs for homeowners across Brevard County. If the evidence points beyond the spigot, review guidance on broader pipe problems and arrange an inspection instead of treating an in-wall leak as a simple outdoor faucet repair.
When should a plumber replace an outdoor spigot?
Not every leaking hose bib needs to be replaced. A worn washer, packing area, or other accessible component may support a straightforward outdoor faucet repair. Replacement becomes more reasonable when the fixture body is cracked, frost-damaged, badly corroded, or difficult to service without risking the pipe connection. The first step is to identify the root cause rather than choosing a remedy based only on where water appears. A repair that addresses the visible symptom may not solve a leak at the wall or in the supply line.
Use the comparison below as a decision guide. If water is entering the wall, the fixture moves when you turn the handle. Or you cannot safely isolate the water, stop testing and have a plumber inspect it. Space Coast Cooling & Plumbing handles leak detection, emergency shutoffs, pipe concerns, and fixture installation for homeowners across Brevard County.
| Option | Decision signals | Risk level | Appropriate next step |
|---|---|---|---|
| Simple repair | Drip or stem-area leak appears limited to a replaceable washer, gasket, or packing component. The fixture body and wall connection remain stable. | Lower, if the water is shut off and the part can be reached without forcing it. | Shut off the local supply, identify the correct replacement part, and avoid overtightening. Persistent packing leaks may need new packing. |
| Complete fixture replacement | The body has a crack or hole, frost damage is visible, corrosion prevents a proper seal, or several internal parts have failed. | Moderate. Removing a seized fixture can transfer force to the pipe or damage threads. | Have a plumber match and install a suitable hose bib or sillcock. Replacement is often more practical than locating multiple hard-to-find internal parts. |
| Supply-line inspection | Water appears from inside the wall, the leak starts only when the faucet runs, the wall connection shifts, or damage followed freezing. | Higher, because concealed pipe damage can affect the wall or nearby building materials. | Close the local or main shutoff when safe, limit water use, and request professional leak detection or pipe inspection before opening or replacing the fixture. |
Corrosion can prevent a proper seal, while cracks or holes in the fixture body are stronger reasons to replace it than to keep changing small parts. Frost damage also deserves caution. In some freeze-related failures, tubing behind the faucet can burst but remain dry until the faucet is turned on. So a previously quiet spigot is not proof that the wall is unharmed. If the fixture leaks inside the wall while running, replacement or supply-line work may be necessary rather than a handle or washer adjustment.
For a safe outdoor faucet repair decision, do not bang a stuck handle or force a corroded connection. Observe where the water emerges, shut off the supply if you can do so safely. And let a plumber assess uncertain or concealed damage before it becomes a larger leak.
How to prevent another outdoor faucet leak
Most outdoor faucet problems are easier to prevent than to repair after water reaches a wall cavity. On the Space Coast, seasonal freezing is less common than in many regions. But an occasional cold snap, storm-related temperature drop, corrosion, or a forgotten hose can still create trouble. A few simple habits reduce the chance that a small leak becomes hidden water damage.
Remove hoses and accessories after use
Disconnect the garden hose, spray nozzle, timer, splitter, and other attachments when you are finished using the faucet. Leaving a hose or another restriction attached can prevent the faucet from draining properly, according to Woodford's troubleshooting guidance. Trapped water can place pressure on the faucet and the pipe behind it if temperatures fall. This matters even more when a hose bib is mounted on an exterior wall.
Before a forecasted freeze, remove and drain the hose. Do not assume that a frost-free faucet is immune to damage. If the faucet has an indoor shutoff, learn where it is and how it works. Close that valve, open the outdoor faucet to drain the line, and leave the faucet open only as directed for the fixture. The supply should be shut off before any repair or component removal.
Know the shutoff and inspect the area
Find the local shutoff for the outdoor faucet, then locate the home's main water shutoff as a backup. A labeled, accessible valve makes it easier to respond if water appears at the wall connection or inside the structure. If the faucet leaks inside the wall while running, Woodford identifies faucet replacement as necessary, not a situation to solve by repeatedly tightening exterior parts. Turn off the water and arrange an inspection rather than allowing the leak to continue.
Check each outdoor faucet at the start of a season and after unusually cold weather. Look for drips, green or white corrosion, a loose wall connection, damp masonry, peeling paint, or water that continues after the handle is closed. A leak-detection device can monitor selected locations, and some devices can automatically shut off water during a leak or rupture. Those tools can limit water loss, but they do not repair a failed faucet or damaged supply line. If you find a recurring leak, unexplained moisture, or a suspected in-wall problem, have a plumber identify the cause before making cosmetic repairs.
Can outdoor faucets be repaired without a plumber?
Sometimes. A homeowner can often handle safe observation and a simple external check. Especially when the problem is a loose hose washer or a small leak around an accessible packing nut. Start by identifying exactly where water appears, rather than taking the faucet apart immediately. Check the spout with the handle closed, the handle or stem while the faucet is running, the hose connection, and the point where the fixture enters the wall.
Before any repair, shut off the local supply if one is available. If you cannot identify or operate that shutoff, use the home's main shutoff instead. EPA WaterSense also recommends turning off the water line before beginning faucet repair and examining gaskets and pipe fittings for water on the outside of the pipe. These observations can help separate a replaceable washer or gasket from a problem that may extend behind the wall. EPA WaterSense guidance supports this basic inspection approach.
What a homeowner can check safely
Remove the hose before testing the faucet. A worn hose washer can leak at the threaded connection, and leaving a hose attached can keep water from draining properly from some outdoor faucets. Replace a visibly damaged washer if the connection is otherwise sound, then hand-tighten the hose and test it. For a leak around the stem, a packing nut may only need a careful adjustment until snug. Do not keep tightening if the leak continues, the metal twists, or the faucet body moves at the wall. Never bang or force a seized handle, because the internal parts or connected piping may break.
When DIY stops being a safe option
Call a plumber if water appears from inside the wall, the wall connection, or an area you cannot see clearly. A faucet can look dry when it is off even though a freeze-damaged tube leaks once the water is turned on. Frost damage, cracks, heavy corrosion, a seized handle, or a fixture that will not shut off also deserve professional evaluation. A crack or hole in the faucet body may require replacement, while corrosion can prevent a reliable seal. If the supply line is uncertain, do not guess based on the visible spigot alone.
If water is actively entering the wall or home, close the main shutoff promptly and review these Brevard emergency plumbing guide steps. Space Coast homeowners who are unsure whether the issue is a faucet, a hidden leak, or a broader pipe problem can request an inspection before attempting a repair. The goal is not to avoid a plumber at all costs. It is to handle a straightforward external check safely and escalate before a small fixture issue becomes concealed water damage.
Frequently Asked Questions
Who should I call if my toilet is clogged?
Call a licensed plumbing professional when the toilet will not clear with a careful plunger attempt, keeps clogging, or is close to overflowing. Call sooner if other drains are slow, the toilet gurgles, or sewage appears, because the restriction may involve a main drain rather than only the fixture.
How do plumbers fix a clogged toilet?
A plumber first assesses the symptoms and the fixture, then selects an appropriate removal method. Depending on the blockage, service may include professional clog removal, drain snaking, hydro jetting, or rooter work. Recurring problems or signs of a sewer issue may call for a camera inspection before repairs are recommended.
How much does a plumber cost to unclog a toilet?
The cost depends on the location and severity of the blockage, whether access is straightforward, and whether related drain or sewer work is needed. Ask what the inspection and recommended work include, and request an explanation of the price before authorizing additional service. Avoid choosing solely on the lowest advertised number.
Will a clogged toilet eventually clear?
It may drain temporarily, but that does not prove the restriction is gone. Repeated flushing can turn a partial blockage into an overflow. If the toilet remains slow, clogs again, or affects other fixtures, stop flushing and arrange an evaluation instead of waiting for the problem to resolve itself.
Contact us for help with a clogged toilet
If the clog keeps returning, affects other drains, or you cannot safely stop the water. Professional service can help identify the right next step and protect your home from an overflow. Contact Space Coast Cooling & Plumbing to discuss clogged-toilet and drain service.